If you have a MOVUS Gateway, please check out FitMachine Onboarding with a MOVUS Gateway.
Things you will need:
- A mobile device with the FitMachine Mobile App installed and BlueTooth capability
- Your login details to sign in to the FitMachine Mobile App
- Your FitMachine sensors
- A correctly configured WiFi Network. Our WiFi Network Requirements article will help you ensure that the FitMachine will be able to connect to your WiFi Network. If you haven't read this, please do.
If you haven't downloaded the FitMachine Mobile App please go to this help article: About the FitMachine Mobile App. The FitMachine Mobile App is required to continue with onboarding.
In the app, enter your email address, password and your organisation name into the appropriate fields. The organisation field is your company. Contact your supervisor for the correct organisation tag.
Step 1 – Scan FitMachine
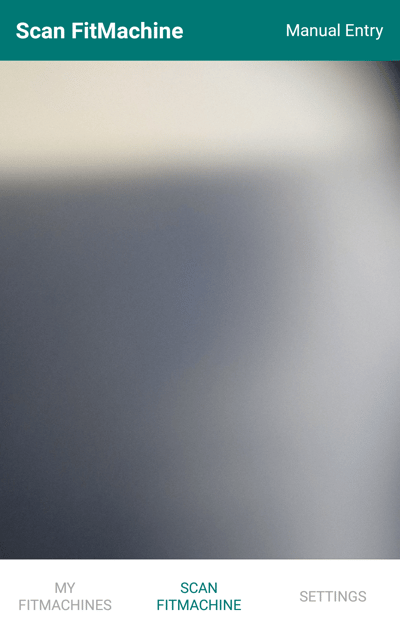
To onboard a new sensor, go to the Scan FitMachine page, which is in the bottom middle section of the image below.
Select a FitMachine sensor to install on your equipment. You’ll notice that each sensor has a 12-digit MAC Address on the front of the sensor and a QR code. This MAC Address is each sensor’s individual identifier, so it is vital that it is correct and associated with the right equipment. Otherwise, you will receive no data or incorrect data from another machine.
The FitMachine App has a QR code scanning module built into this page which you can use to input the MAC Address into the app. If you’re having trouble scanning the QR code, it’s possible to manually input the MAC Address but be very careful to enter every digit correctly.
MAC Addresses are written in hexadecimal, and hence there are only zeroes in the code, never any letter O’s.
To return to the previous page at any point, click the arrow in the top left-hand corner of the app. If you need to restart the onboarding process, hit the reset button in the top right-hand corner to erase all entered data.
Step 2 - Choose Connection and Network Check
On this page, you can choose how the particular FitMachine will connect to the MachineCloud. At this point, you will want to select the "My Own WiFi" option.
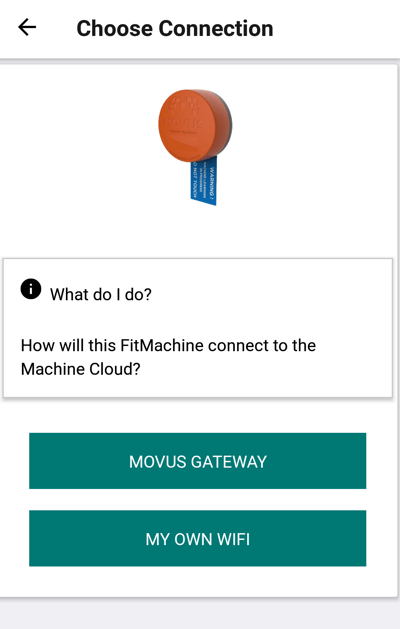
Please enable Bluetooth at this point so that the FitMachine can be updated based on your selection.
Select ‘Add a WiFi Network’.

Select the relevant security type (Unsecured or WPA2).

Enter the network credentials of the network you’d like to connect to.
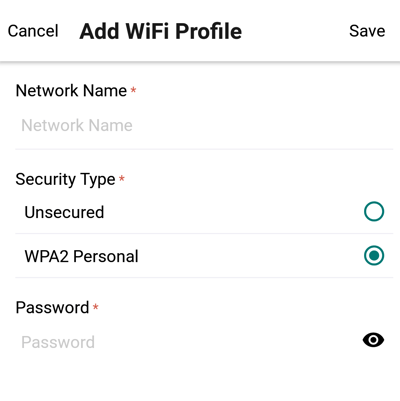
Press Save in the top right-hand corner of the screen. You will see that your WiFi network has been added to the list of Saved WiFi Networks on the FitMachine.

After you have gone to the next page, some safety information will be shown to consider before the installation of the FitMachine.
Once you have read the safety information, the app will perform a Network Check to ensure that the FitMachine can connect to the MachineCloud.
If the FitMachine isn’t in the desired installation location by now, make sure that it is in place and all covers are closed or put back in place as they would be during regular operation. Please re-run the check after the FitMachine is in place.
Ensuring all covers are closed and running a Network Check in the desired installation location will simulate the environment where the FitMachine will be monitoring your equipment. Testing the signal strength of the network with all the covers off will make it easier for the FitMachine to connect to the network and may result in the FitMachine not reporting once the covers are put back in place.
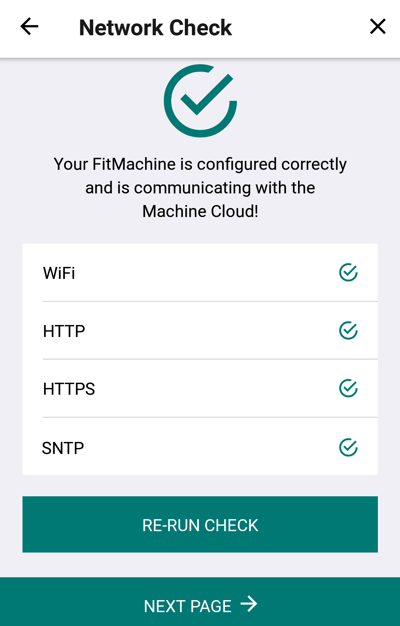
If your network check doesn't look like the image above, please re-run the check. If the problem persists, please screenshot the test and get in touch with us at support@movus.com.au or on +61 1300 031 115, and we will help you diagnose the issue.
Step 3 – Location and Site Info
Next, find the GPS location of the asset being monitored. To ensure that the pin is dropped accurately, please zoom right in by touching the screen with two fingers and then moving them apart. Your current location should be able to be seen on the map. If it isn’t, please check the location settings of your phone. Tap and hold the pin to drag it small distances, or tap to drop the pin in the most accurate position of your equipment. Zoom in and out by pinching the screen and look around by swiping in the desired direction.
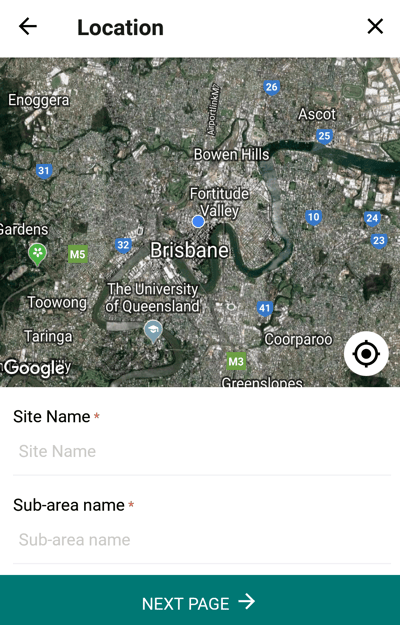
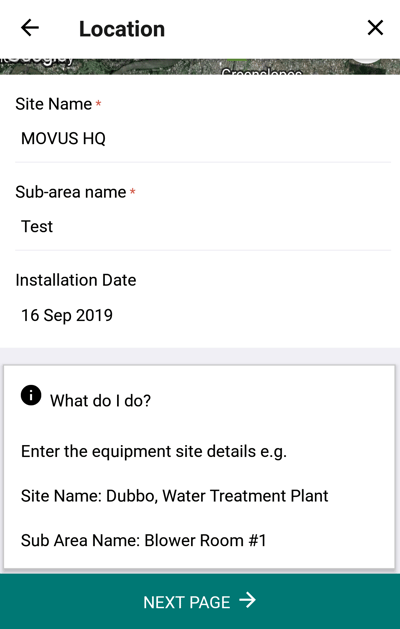
Underneath the map is the information regarding the installation location. Type in the name of the site you’re installing in, then type in the sub-area name and change the date if necessary. An example can be found below the input fields in the application.
Step 4 - Equipment
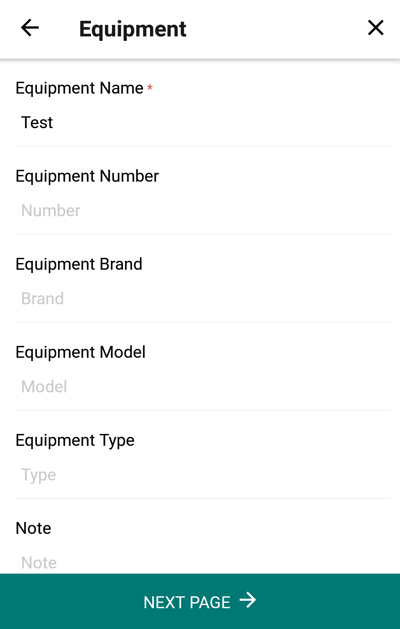
On this page, you are required to input details about the equipment to be monitored. The equipment name and number should be found on a company equipment list or the equipment nameplate, while the brand, model and equipment type can be found on the equipment nameplate.
If there is anything important or worth noting regarding the piece of equipment, FitMachine installation or the last inspection, add it to the Notes tab.
Step 5 – Specifications
This page is for equipment-specific details, which can be found on the equipment nameplate or the motor nameplate, depending on the equipment. The equipment capacity can be a flow rate at specific operating conditions, or some chillers will detail the volume or mass of refrigerant that they’ve been filled with.
The Power Rating field refers to the kW rating of the motor on the equipment, which will usually have its own nameplate. If your pump provides a power rating in horsepower (HP), convert to kW by multiplying the horsepower by 0.7457. You should find the max RPM for the equipment on the same nameplate.
If the equipment includes a variable speed drive or is installed in an area that requires confined space training, tap the toggles if necessary.
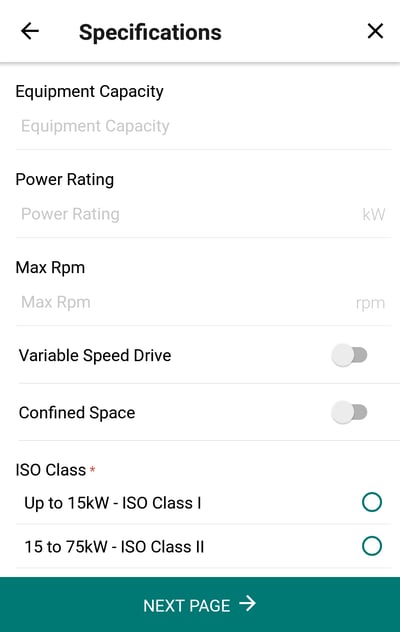
Select the appropriate ISO class for the equipment you’re installing on. Equipment are sorted into their ISO class depending on their Power Rating and how they’re mounted (as shown in the table below).

Step 6 - Photos
The photos taken are valuable tools for keeping your personnel safe, validating onboarding data and locating FitMachines. Our The Importance of Photos article expands on how important photos are to a successful installation of FitMachine.
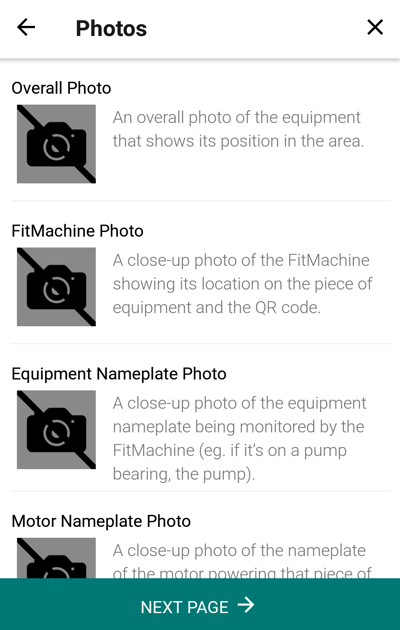
The Overall Location photo should show the equipment in full and, if possible, include the location of the FitMachine.
The FitMachine Location photo is a close-up photo of the FitMachine where you can clearly see where it’s installed and the sensor MAC Address.
The Local Nameplate photo is the overall nameplate of the equipment. These vary in size from machine to machine, but they will usually show the overall specs of the equipment, such as its serial and model numbers, power requirements and equipment capacity.
Finally, the Motor Nameplate photo is exactly that and may be difficult to access on some equipment. Try to make sure that as much of the nameplate is legible in the photo as possible.
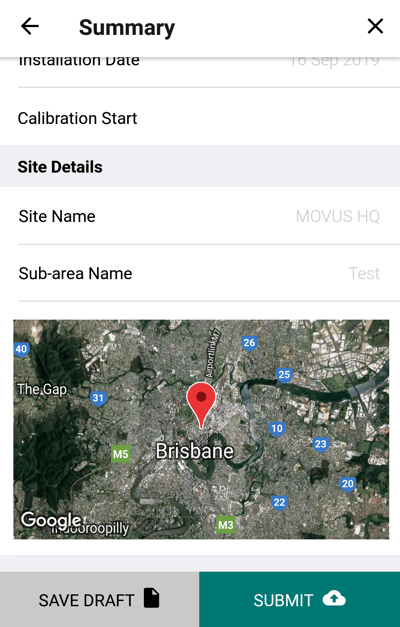
Step 7 – Summary
Finally, the summary page shows you all the information you’ve entered throughout the onboarding process. Any fields that have been missed will show as empty. If you’ve missed a field, you can cycle back to the appropriate field by pressing the arrow in the top left-hand corner of the app screen. If you need to restart the process for any reason, tap the reset button in the top right-hand corner to clear all entries and return to the welcome screen.
To complete the onboarding process, scroll down to the end of the summary page and click submit. Submitting can take some time depending on your internet connection. If necessary, you can save all the information you have already put in as a draft and submit it later once you have a better internet connection.
Congratulations!
You have completed the onboarding of your FitMachine. Your FitMachine will now be listed on the ‘My FitMachines’ page on your FitMachine Mobile App. This page shows recently onboarded and partially onboarded sensors and links to your equipment dashboard.
What else should I look at?
- The Duplicate Function: learn how you can duplicate existing information to speed up the onboarding process.
- How to do a Network Check
- WiFi Network Requirements
- How to Program WiFi Credentials into a FitMachine Sensor
- About the FitMachine Mobile App
- The Importance of Photos
---
Thanks for reading. If you have any questions or concerns, please contact MOVUS Support here.